

Automation is a little side hobby of mine. I like to create automations that make my life easier. One of the things I automate is sharing my blog posts. I write a lot here, and I want to share these posts on social media. And I’m on Twitter, Instagram, Linked In, and Facebook. I have a LinkedIn Company page. And those are my business accounts, I also have personal accounts and sometimes I’d like to send these posts there too.
If I personally went and shared that post to each account, it would add a lot of time to my day doing that each day.
Instead, I automate it. Now, some people will tell you that this is a bad idea and argue that each platform should be different because each platform is different. And, as a general rule when it comes to posting on social media, I definitely agree. You shouldn’t post the same statuses to every social media network because they are different with different audiences and different intended uses.
However, when it comes to sharing a new blog post? I can automate that. It doesn’t mean I’ll stop sharing in other ways. Additionally, with the help of Advanced Custom Fields, I can even create different statuses for each platform if I want.
What tools do you need for automation?
Depending how detailed you want to be, you’ll need just a few basic tools and plugins.
Don’t worry, all of these have a free level and will likely get you to what you need.
To begin with, we’re going to assume you have a WordPress blog and you’re on at least one social media platform. You’ll need to have a Zapier account for the first step, so go ahead and set up the free Zapier account and get that verified.
Setting up the first Zap
The first step in this process is connecting WordPress to one of your social media platforms. If you are using the free level of Zapier, then your zaps can only have two steps, so you’ll have to create a new zap for each social media account separately, but you get up to five zaps so as long as you are on five social media networks or less, you can get by with a free Zapier account.
Step 1: Create a new zap. Click the Make a Zap! button to start the new zap.
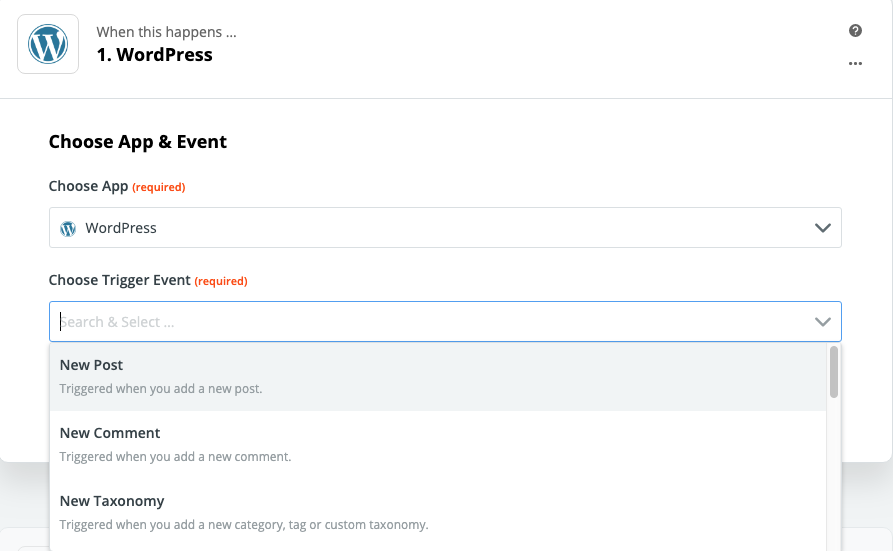
Step 2: Choose the App and Event. In this case, you’ll want to choose WordPress as the App, and New Post as the trigger event. This means that the Zap will fire when a new blog post is published.
Step 3: Connect your website. Once you have chosen your App and your Trigger, you have to connect Zapier to your WordPress site. (You’ll need your WordPress login and password for this step.) When you add the account, a new window will pop up asking for the URL of your WordPress site and your login and password. Note: If you have turned off the XML-RPC for security reasons, you’ll need to turn it back on to make this zap work.
Step 4: Customize your post. Choose the post status of what you want to share (Published) and the Post Type you want to share. These are optional, so if you are just sharing blog posts, you don’t necessarily have to do anything here. If you are sharing content from a custom post type (like maybe your portfolio) then you’d want to pick a custom post type here.
Step 5: Test and Review. Next you’ll want to test and review your WordPress connection. This step reaches out to your site and attempts to pull some sample posts. Don’t skip this step, it lets you know if your connection is good.
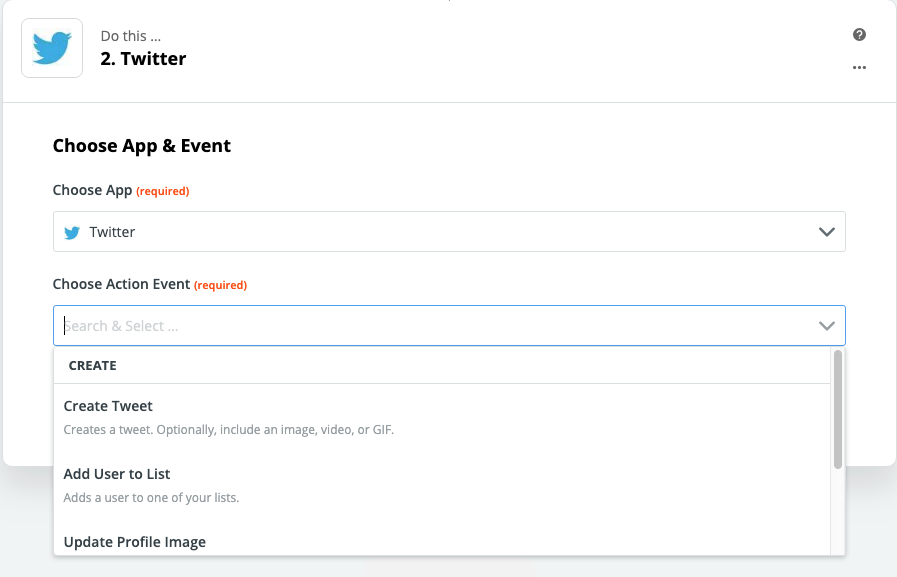
Step 6: Setting up your Action. We know that something is going to happen when you publish a post, now is the time to designate what. Let’s start with Twitter. Search and select Twitter as the App and choose Create Tweet as your action.
Step 7: Connect your Twitter account. Choose Add New Account and follow the steps to authorize Zapier to connect to your Twitter account.
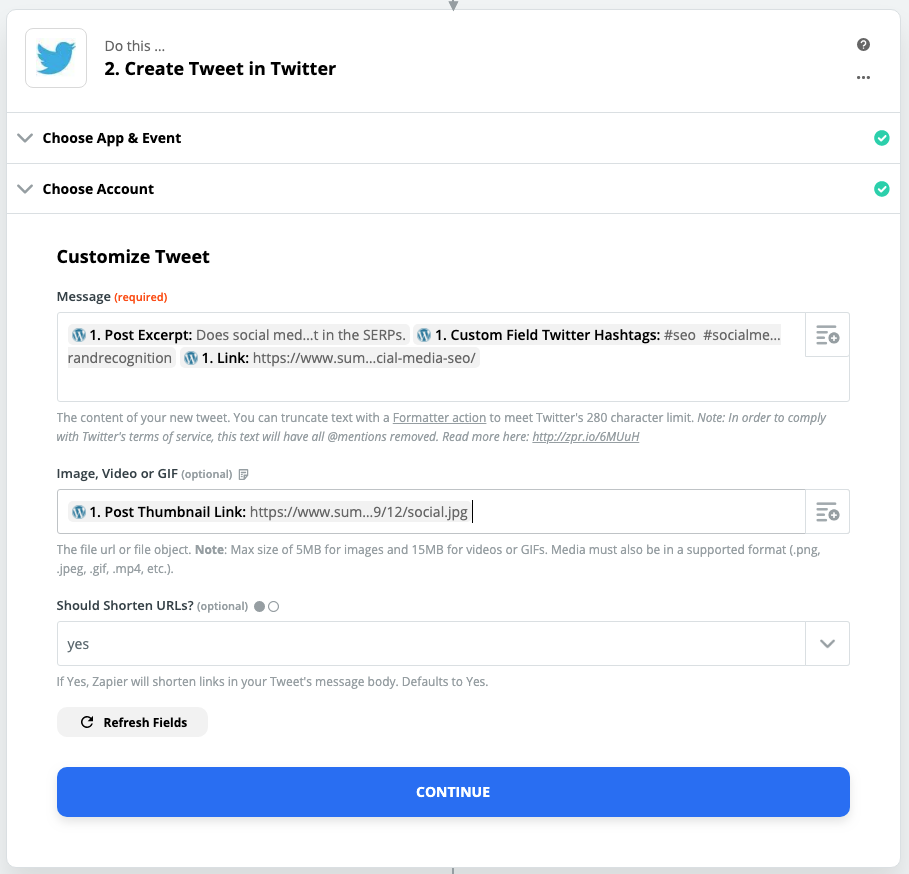
Step 8: Customize your tweet. Next is the most important part, it’s where you customize your tweet, meaning choosing what you want to be shared, picking the image, etc. First you’ll want to pick the message or status to share. This can be your post title in most cases. Or, if you want to get fancy, you can use Advanced Custom Fields to set up a personalized status within your post. (This is what I do.) Pick your title or message you want to share, and then also be sure to add the permalink to it, so your tweet has a link. Then you can set your featured image to be shared with the Tweet and hit continue.
Step 9: Test. The next step is to test your connection, which WILL send a tweet to Twitter, so be prepared to have something shared. Either it’s what you want to share, or else you go and delete it right away. Don’t skip this step, you want to see how it looks and to make sure it works.
You can duplicate this zap and change the social account and do the same steps for Facebook, LinkedIn, Pinterest, etc. It works for almost all social media networks EXCEPT Instagram.
What about Instagram?
So, Instagram only has one real connection in Zapier (as of now) and it’s a reverse of what we want – if you post to Instagram, it can create a new post in WordPress. That’s not really helpful if you are wanting to share your post to Instagram.
If you want to automate posting to Instagram from WordPress, you’ll need the help of an social posting tool like Buffer or Hootsuite. I use Buffer, so I’ll use Buffer in my example. (And Buffer has a free level which I can’t find at Hootsuite.)
First, create your account with Buffer connect it to Instagram.
Follow steps 1-5 from above in a new zap.
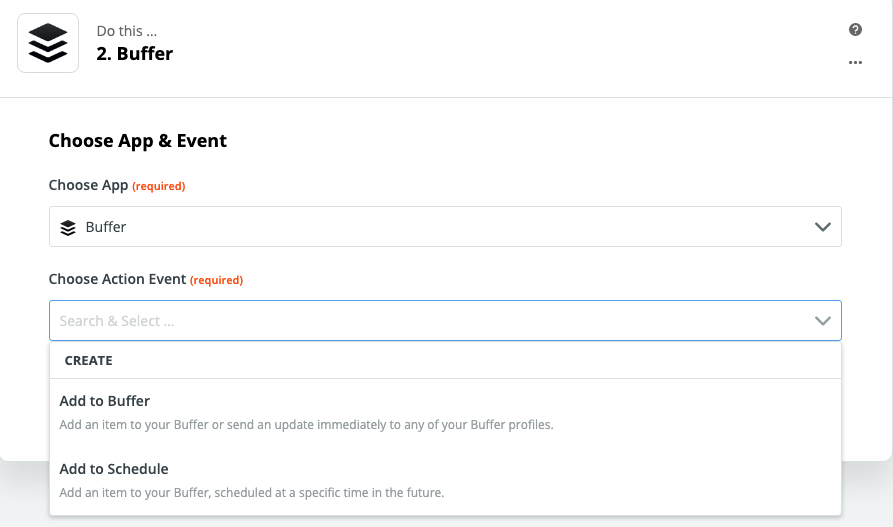
Step 6: Setting up your Action. Instead of choosing a social account, you’ll choose Buffer. You have two action options with Buffer, one is to Add to Buffer the other is Add to Schedule. The latter will schedule your instagram post to go out at a later time, the first pushes your post out immediately.
Step 7: Connect your Buffer account. Choose Add New Account and follow the steps to authorize Zapier to connect to your Buffer account.
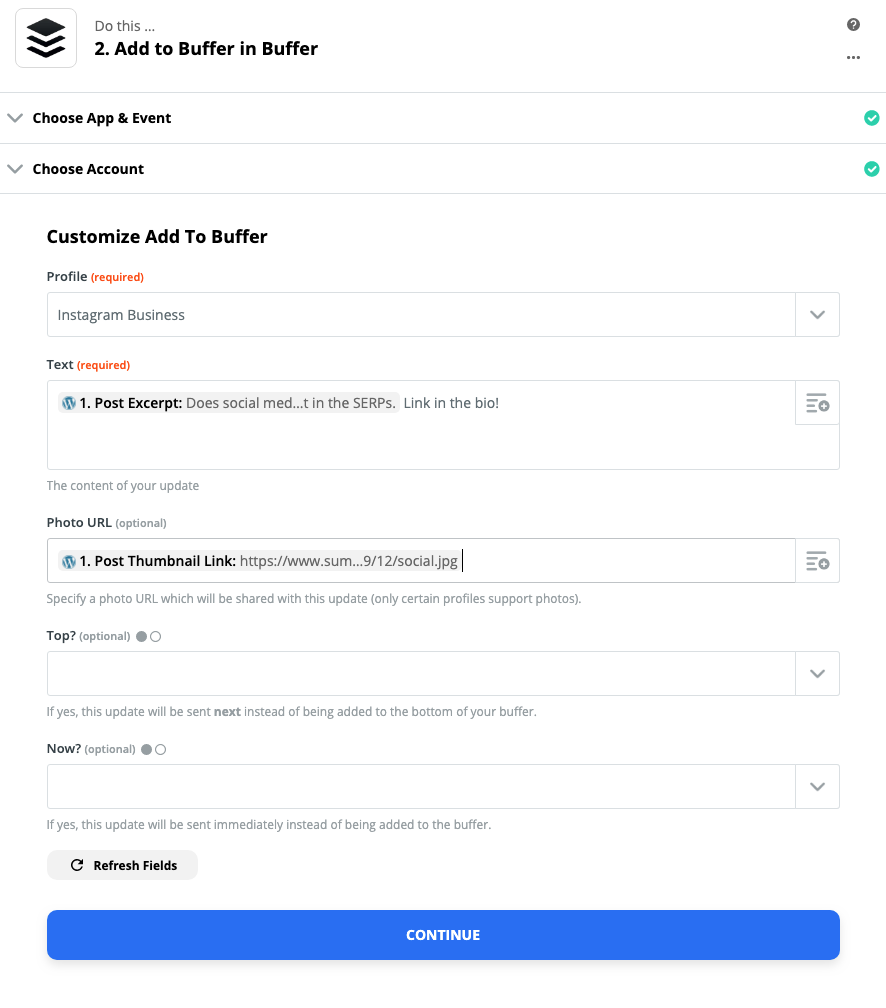
Step 8: Customize your post. When you add to Buffer, you will need to choose which Profile (in Buffer you can connect multiple social accounts) then pick your text (or message) you want to share. You need to pick your photo URL (featured image). It says optional for this, but if you are sending it to Instagram, this is obviously not optional.
Note: Don’t include the permalink for Instagram, since links don’t work in Instagram posts and it’s actually against the Instagram Terms and Conditions. Most people will post “Link in the bio” and then update the bio. I don’t add that because everyone on Instagram knows that the link is in the bio (and I keep my bio link as a link to my blog so it always works.) But you could definitely add “Link in the bio” text to these posts too if you like.
Step 9: Test. The next step is to test your connection to make sure it works. Voila, auto posting to Instagram works too!
Getting Fancy with Advanced Custom Fields
So these zaps are great on their own, but you can really get some cool stuff going on if you add in Advanced Custom Fields. You can add ACF to your site just by going to Plugins -> Add New. Once you have added it and activated, it’s super easy to add new fields to your posts. Just go to Custom Fields and add a new field group. You might name it something like Social Postings or something else to denote what those fields are for.
These fields won’t show up on your website (unless you do some work to make that happen) but Zapier can see them and pull them into the postings for you. For example, I don’t want to pull the title of my post into Twitter, I want a custom status.
So go ahead and create all the fields you want. I have one for my custom message and one for my hashtags.
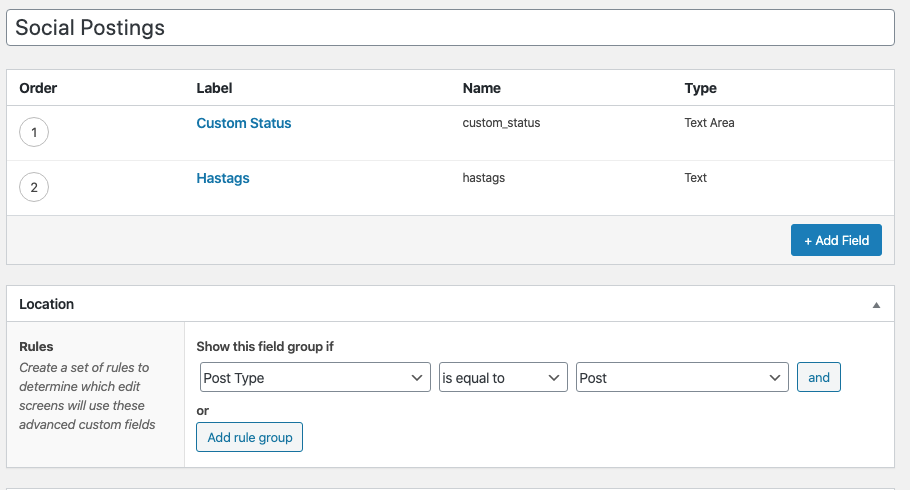
Now when I write a new blog post, I can enter a custom message that I can use as my Tweet or status, and I can enter the hashtags I want to use with my post.
Important message: Hashtags don’t mean anything on your blog, so don’t stuff them into the title. That’s useless and distracting. That’s why we have the custom field, so you can add your hashtags that will go to social media, where they actually are useful.
Once I have my fields set up and have at least one blog post that has content in those fields, I can create a new zap and when I get to step 8, customizing the post, I can pull in both my custom message and my hashtags.
Wait there’s more!
What I like about this is that I can add my hashtags to my Instagram status and my Twitter status, but leave it off Facebook and LinkedIn where they are less useful.
I could also create custom fields for each social network, and write up a different status for each social profile so that all my shares are different. This is a great idea! (But it does make more work for you in creating unique status updates for each post.)
One more fun thing
I like to share my blog posts to my business Twitter but also share them to my personal Twitter account. However, in that instance, I want to give credit that the tweet is from my business, so I’d like to add via @sumydesigns to my posts.
However, Zapier doesn’t let you put @usernames in your customized messages. 🙁 But I have a workaround! You can create a new custom field in ACF called “business profile” and set the default value to your Twitter account name. When you customize your message, you can pull in that custom field. However, you have to add the @ right in Zapier and put it right next to the custom field. Technically, the @ symbol isn’t connected to a username, it’s connected to a custom field… which happens to be a username. Sneaky huh!

So now when I publish a post, it gets shared to my personal Twitter account, giving full credit to my business account.
A few final thoughts
If you use the free Zapier account, you can only have two step steps in a zap, meaning you have to create a new zap for each social network. However, if you use a paid plan, you can create one zap with multiple steps, meaning that you can repeat steps 6-8 for each social network from one trigger. If you use Zapier for other things (and there are many things!) it’s worthwhile to upgrade. (I get no money from Zapier for this, I just love it.)
You should also check in on your automation once or twice a year, to make sure that you’re still happy with how your messages are going out. I almost always make changes to mine. (For example, this year I added the hashtags custom field to my posts.)
Are there possibly easier ways to share your posts automatically? Sure, there are plugins and you can do some of it through Jetpack. But this way really gives you the most ways to differentiate and customize your social automations.
Want me to set up automations for your business? I’m happy to help! Contact us today for more info.

Amy Masson
Amy is the co-owner, developer, and website strategist for Sumy Designs. She's been making websites with WordPress since 2006 and is passionate about making sure websites are as functional as they are beautiful.