

Now that we’re all settling into our new normal, it has become evident that much of our work can be done via video conferencing, and one of the most popular tools for that is Zoom.
It’s easy to add your colleagues in the office and start up quick video conferences on the fly with Zoom, but what if you want to offer online scheduled presentations or webinars right on your website? You can do that with Zoom too.
Things you need
- A Zoom account.
- The Video Conferencing with Zoom plugin, freely available from the WordPress Repository.
The first step is to install and activate the plugin. It’s pretty easy. Once you do, you’ll get a new area in your Dashboard called Zoom Meetings.
The next step is to configure your settings.
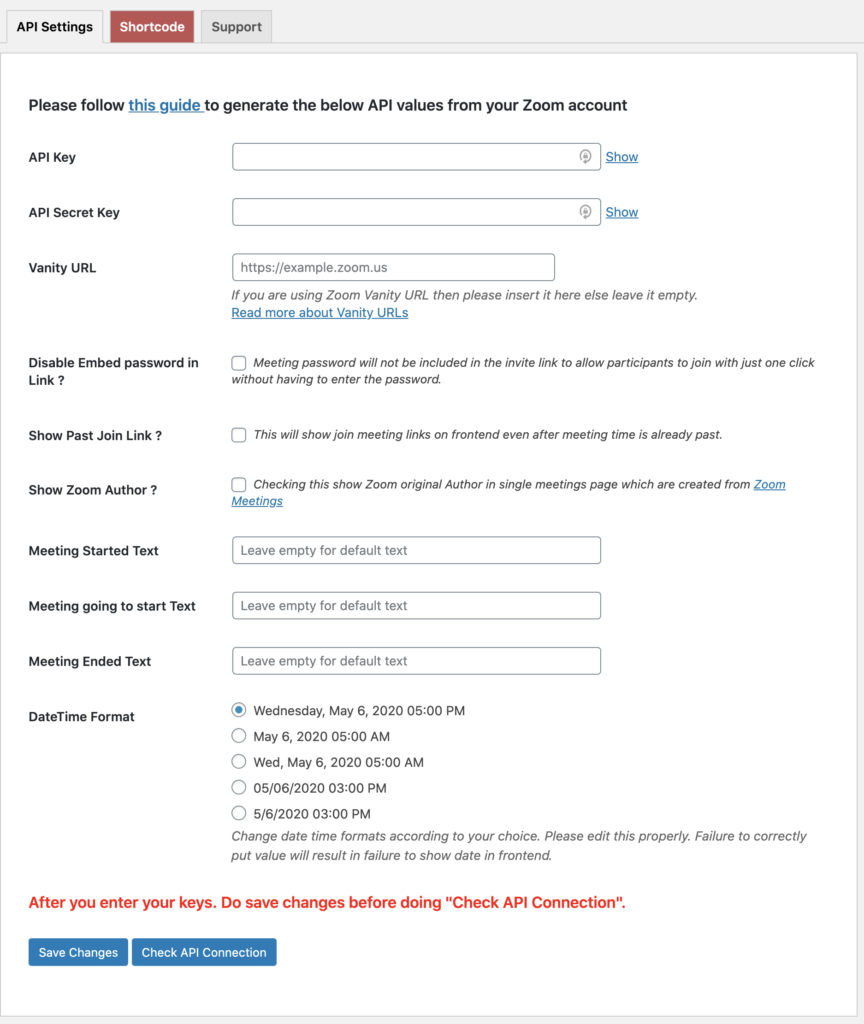
The first step is to create your generate your API Key and Secret.
- First, make sure you are signed into your Zoom account.
- Go to https://marketplace.zoom.us/develop/create/
- Select JWT and press the Create button.
- Name your App. It can be whatever you want, make it unique so you remember what it is, I like to use my domain name so I don’t forget.
- Fill in your contact information and press Continue.
- And on the next screen, you will get your API Key and Secret. Copy and paste those into the API Key and Secret boxes on your website. Back on the
- First, click “Save Changes” and then click “Check API Connection.” If you try to check the API connection before you save, it won’t work.
That’s the basic set up of your connection, easy right? But that’s not everything you need to do. That just connects your website with your Zoom account. Now you can display your meetings on your website.
Set Up Your Meetings in Zoom
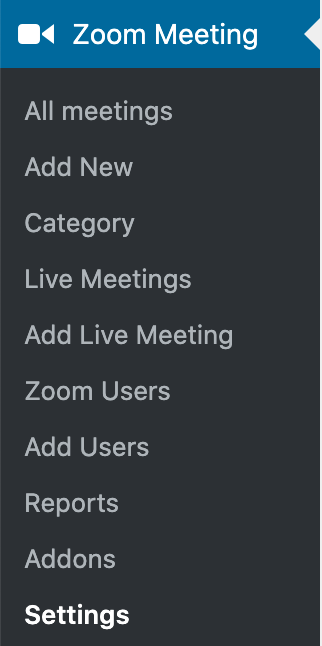
The next step is to add your meetings. You’ll notice now that your navigation menu under Zoom Meeting in the Dashboard has expanded now that you’ve added in your API key.
Head on over there and click “Add New.” This works just like adding a post or page, except you’ve been given the gift of Zoom Details.
Give your meeting a title. I recommend writing a description. You can choose a featured image if you want, and you can also add a category. If you are going to have a lot of meetings, it’s a good idea to categorize them for simple organization.
Then pop down to the bottom of your post and fill in your Zoom meeting details.
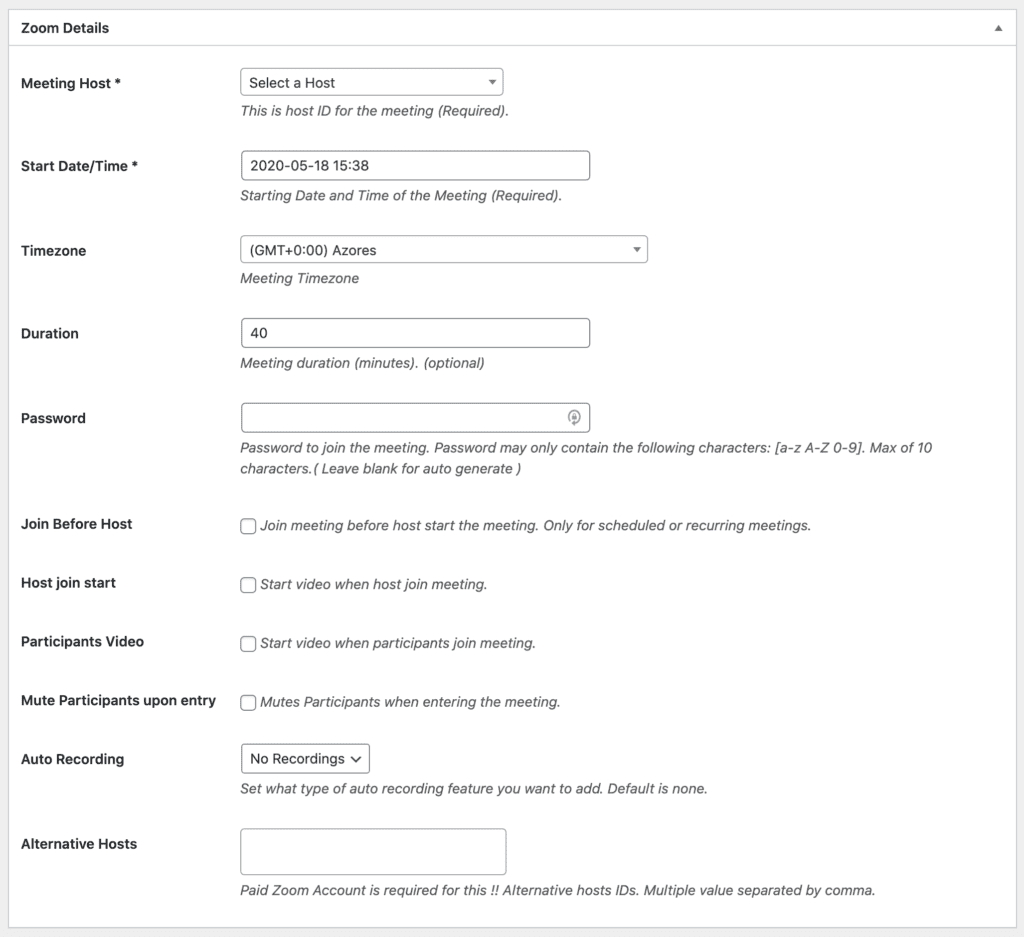
Most of these settings are self explanatory. I tend to choose to auto-record for my meetings, because if a few days have passed I am afraid I’ll forget the details! If these are public meetings, they should be recorded for transparency anyway. Once you finish all the details, go ahead and Publish your post.
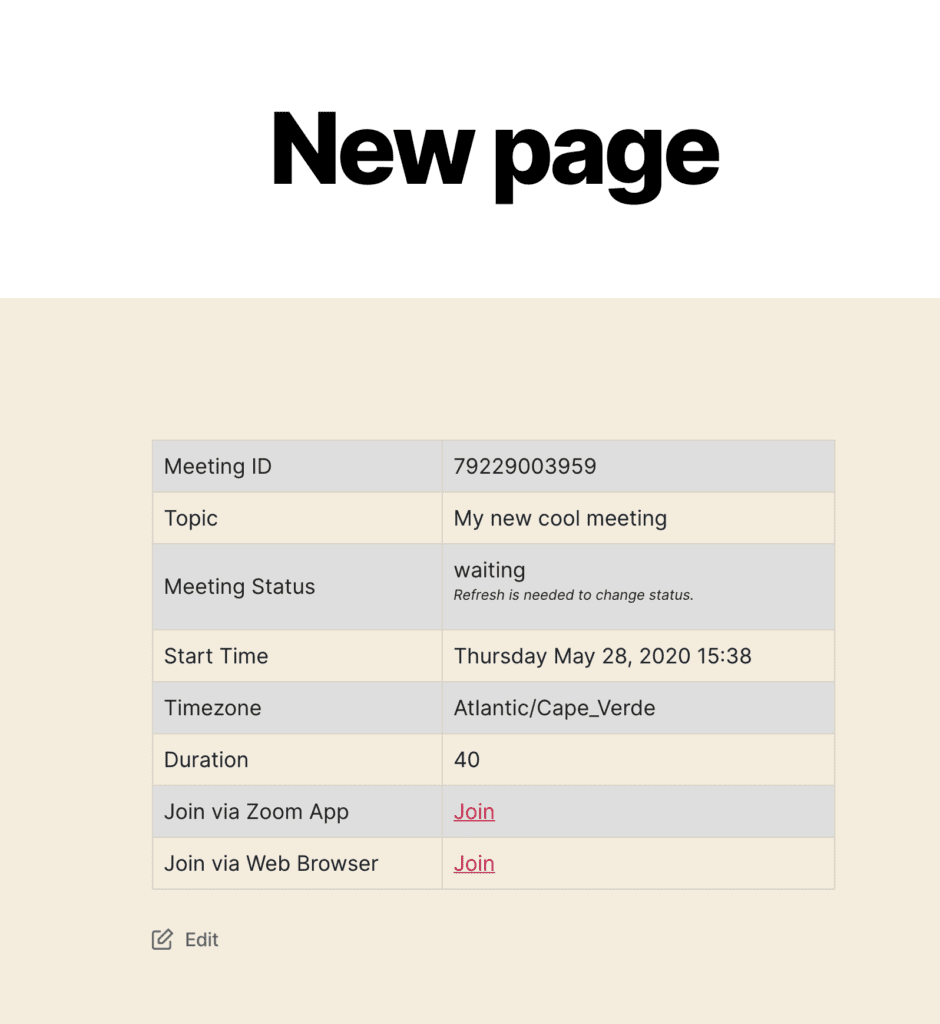
Once you publish, you will have created a new meeting. If you go to Zoom, you’ll see that new meeting there. And you’ll have a new post link in your site that you can send to people so they can see your meeting details and join your meeting. Out of the box, it’ll look something like this:
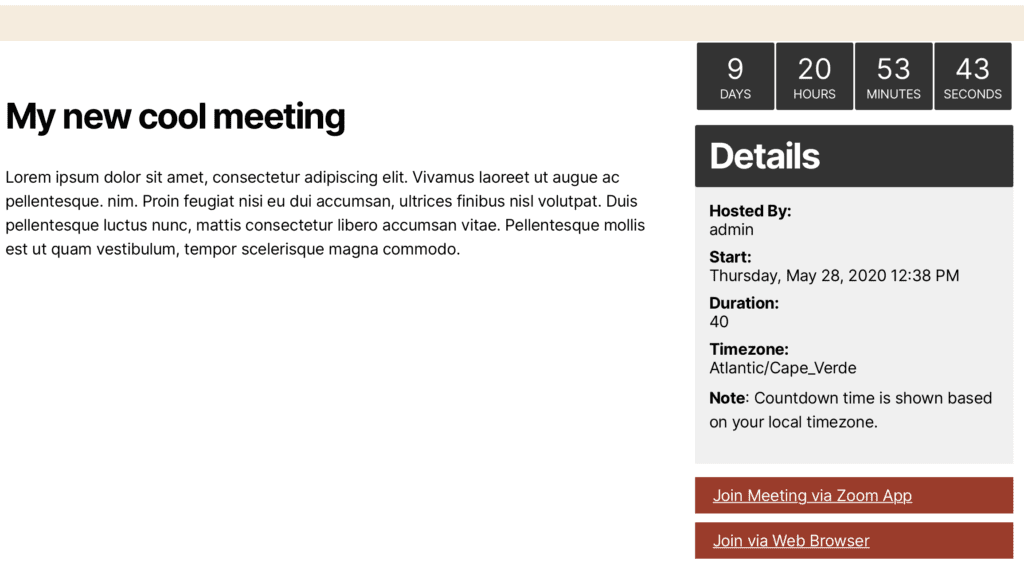
It’ll by default pick up the style settings of your theme and should match accordingly. You can also do your own styling via CSS if that’s up your alley. I set up this test on a blank site with the default theme.
When it’s time to run your meeting, you can login to your Zoom app and start it OR you can go to your new Zoom meeting page on your website and click “Start Meeting” to start it right up from your website. Pretty cool.
Once you publish a meeting, you’ll also be given a shortcode that you can put anywhere in your site to display your meeting details. When you do that, it looks like this:
Additionally, you can create pages that show multiple meetings. You can show your meetings by category too. This is helpful if you have different meetings with different audiences or different purposes. If you are a government entity, you can categorize your meetings so that people can find all the meetings of the park board separately from the meetings of the drainage board. There are a lot of ways you can customize and create your Zoom meetings to display on your website.
Customize Your Meetings
There are customizations you can make when setting up your Zoom meeting in your WordPress, such as having participants video come on when they join, muting them upon entering the meeting (which is one I recommend), and setting up auto-recording, which is nice if you plan to review the meeting or feature it on your website later.
Adding Live Meetings
Once you add in your plugin and configure it, you’ll see that you can add a new meeting and also add a live meeting. So what’s the difference? When you add a new meeting, it is typically for a future time and allows you to share that meeting information publicly on your website. This is great for those organizations that need to have virtual online meetings, such as government bodies, charity organizations, board meetings, etc. When you create this meeting, it creates it on your website with joining details, and also creates the meeting in Zoom, so when it’s time to start the meeting, you just have to open Zoom and hit start.
A live meeting is different because it creates a new meeting in Zoom, but does NOT add it to your website. This is useful for creating private meetings that you don’t want the public to access.
A few Zoom Online Meeting Tips
Once you publish your meeting on your website, anyone can join and some pranksters have been trolling people by joining publicly displayed meetings and sharing not so fun things on their screens. So here are a few tips to help you run your meeting smoothly and securely.
It’s a good idea to disable join before host – which allows your other users to join and begin interacting prior to when the host actually starts the call. This lets you remain in control.
Turn on your waiting room. This means that the attendees can’t join until you admit them to the meeting. You can customize the waiting room with your logo, description, etc for your attendees.
You can also password protect your meetings, meaning only users who have the password can access the meeting.
Finally, if it’s a public meeting, I recommend that you disable screen sharing and private chat for your meetings.
This post is just the basics of setting up your Zoom to WordPress basics, there are tons of things you can do, including customizing the display of your meetings, uploading and archiving recorded videos, and more. It’s a great benefit during these pandemic times to have these options.
Need help with your Zoom to WordPress integration? Contact us today for a quote.

Amy Masson
Amy is the co-owner, developer, and website strategist for Sumy Designs. She's been making websites with WordPress since 2006 and is passionate about making sure websites are as functional as they are beautiful.
Hi Amy, I have multiple tutors and therefore create multiple meetings. So, there are different pages and each page has the meeting shortcode. My problem is I wouldnt like a user to see all meetings on one page. But, when I setup the Zoom meetings plugin and create different meetings, a user can easily go to /zoom-meetings/ to see all meetings. Is there a way to limit visibility of this page containing all meetings?
You can probably use categories to separate them and then load the zoom calls on different pages by category.
Do you know if this works for participants on iOS devices? I’m finding references to this:
“Joining the meeting directly from the WordPress page may not work for IOS devices because Apple doesn’t allow loading of an external iframe, therefore, the plugin provides a Zoom app link on the page for users to join meeting via Zoom App in case it doesn’t work on their specific device.”
Users should be able to join the call via the browser OR via the app.