

When you make your first website, you will almost certainly need at least one form, usually so people who visit your website can contact you. You create a form, pick fields like name, email address, message, and slap your form on a page and boom, you’re done right?
Nope. There are three different components to any website form: the form itself, the confirmation message, and the notification message. This is true using almost any form builder on any type of website, but since I use Gravity Forms for WordPress, I’m going to go through how to set up a really good form and cover all three components.
A little about Gravity Forms and why I use it
When we started out in business, almost seventeen years ago, we made sites and used Contact Form 7. It’s free, and the most popular form builder for WordPress in the repository. But it didn’t do everything I needed, so I started looking for other options, and that’s how I found Gravity Forms. The most basic version gave me an easy to use form to set up for clients, great options for spam control, and a ton of exciting integrations. I switched over and I haven’t looked back. I’m an official Gravity Girl.
First Form Component: The Form Fields
Many people add their form builder, drop in their fields, plop it into a page, and consider it done. But that’s really only step one. There are three separate steps to have a fully functional form. The first one is building the actual form.
Once you install Gravity Forms and enter your license key (and sorry folks, there’s no free version), the first step is to create your first form. For the most basic forms, you want at a minimum fields for name, email address and message.
So start by going to Forms and then choosing New Form to get started. On the right, you’ll have options for Standard Fields, Advanced Fields, Post Fields, and Pricing Fields.
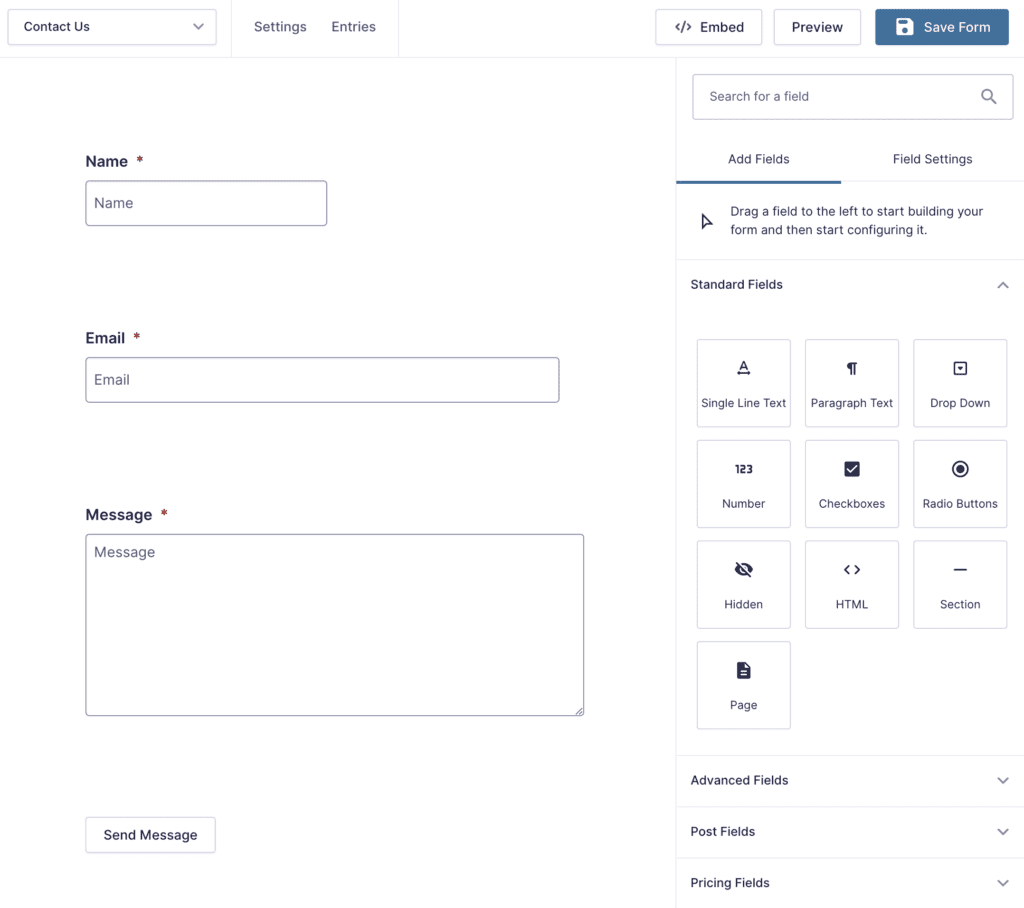
This is the easy part depending on how complicated your form is. This one is super easy with just three fields, but you can make your forms much more complex, including job applications and online order forms with payments. Throw in some conditional fields, and this form can get complicated fast. But for this blog post, we’re going to just go with a simple form. Add your fields and save the form.
Second Form Component: Configuring the Confirmation
The most often forgotten part of setting up Gravity Forms for WordPress is the confirmation. The confirmation is what happens for the site visitor after they complete the form. By default, out of the box when someone completes a form, they get this message:
Thanks for contacting us! We will get in touch with you shortly.
And sure, that works on a most basic level. But it’s so inadequate for most situations. There are three basic things you want in a confirmation.
- A thank you to the person who submit the form. They didn’t have to do that. You wanted them to do it. They did. So you need to thank them and let them know you appreciate and value their message.
- A message about what happens next. Will you call them? Email them? How long will it take? Do you usually respond in 24 hours? 48 hours? How will you contact them? What should they do if you don’t get back to them? Be sure that there are no loose ends here.
- Finally, you need to give them something to do after they are finished with the form. Don’t let that just be the end of their visit like a door slamming in their face. What else could they do? Do you keep an active blog that they might find useful? Do you want them to check our your social media presence? What about a product they might like to buy? Or maybe a great photo gallery of your work? There is so much more you probably have on your website that you could direct them to rather than give them an abrupt stop sign.
So how do you do this? In Gravity Forms, go to your form and click Settings and then Confirmation.
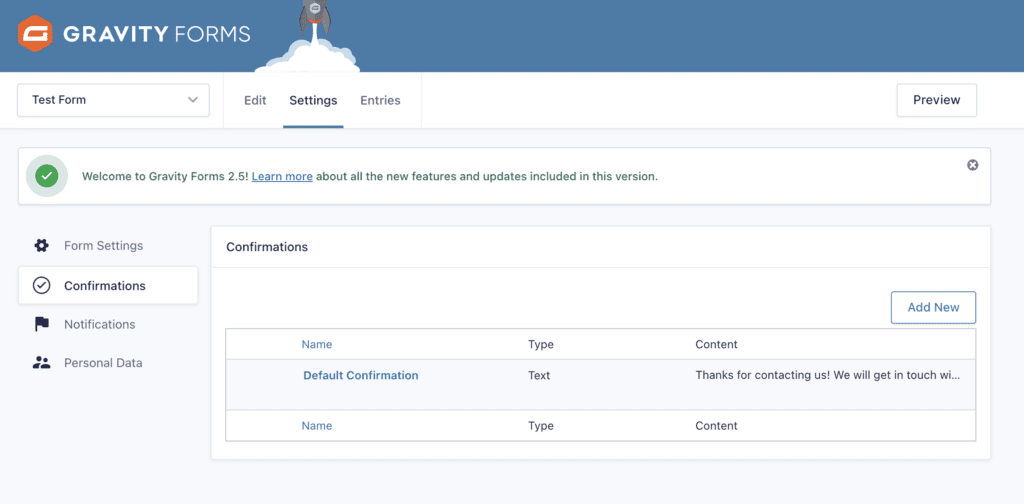
From here, you can click on the default confirmation to edit the text. If the only thing you do is edit that text, that’s at least one step in the right direction. But what I find much more valuable, for a variety of reasons, is to create a special Thank You page. You can learn more about the thank you page in a blog post I wrote a few years ago, but it’s still valid.
The TL;DR version – create a new page on your site specifically to be seen after someone submits a form. Then in your confirmation, instead of having a message show, have the person get redirected to this new page.
Third Form Component: The Notification
The second most forgotten part of Gravity Forms in WordPress is the notification. A notification is how and who gets an email alerting them of the new message that was sent. If you do nothing, then a generic message will be sent directly to whatever email address is the admin email address on the website. That might be yours. But it could be your developer. I can’t tell you how many times someone has set up a new form and then all the submissions go to me because they forgot to configure the notifications. This is a not optional part of setting up a new form.
There are three basic parts to this as well, if you want to keep it simple.
- Who gets the notification?
- Who the notification is “from”. (I’ll go more into this below.)
- And what the notification says.
To set up the notifications, in Gravity Forms, go to your form and choose Settings and then choose Notifications. You’ll see something that looks like this.
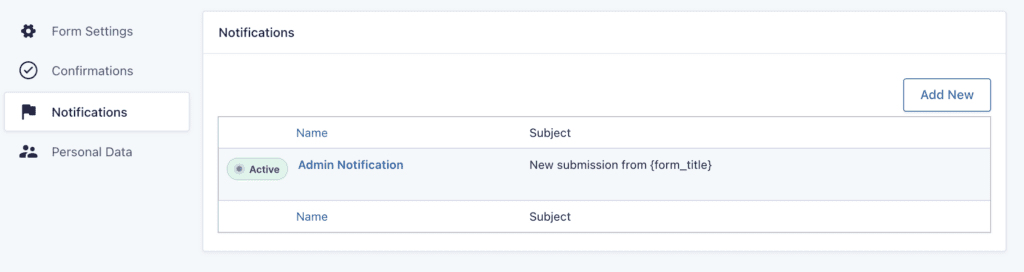
You’ll see the notification is active. But this isn’t done. Here’s what it looks like when you open it up.
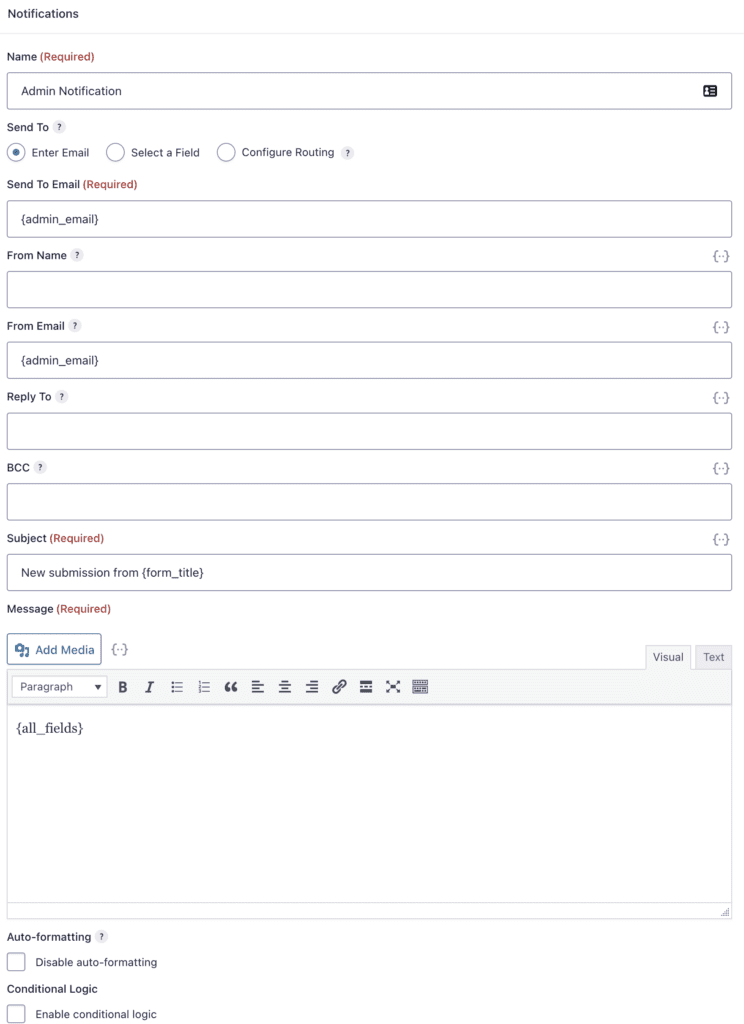
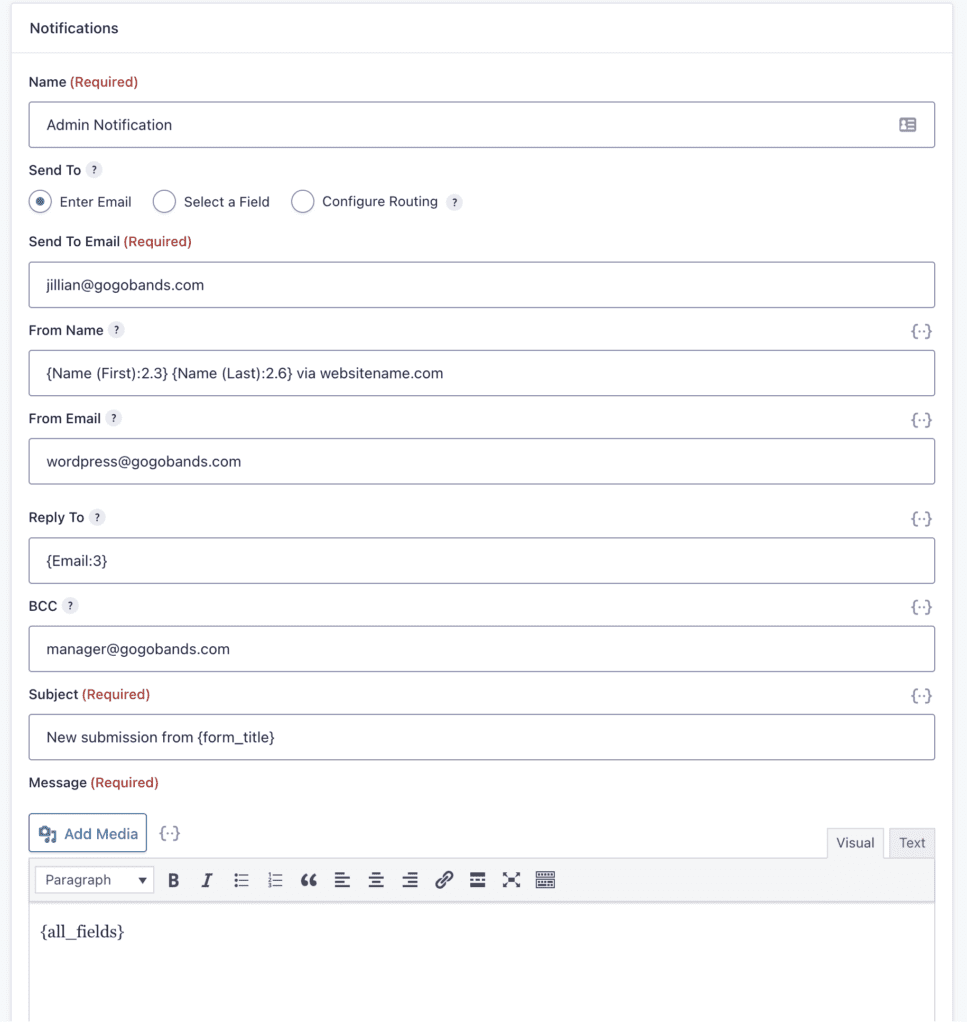
By looking at this, you can see that the default email address is set to the admin email (whoever is the main admin on the site) and then the from email address is the same. Then you have a very basic subject field and get all the fields submit in the body. This is not the optimal set up.
First, change the Send To Email address, to confirm it’s really the email you want to receive these notifications.
For the From Name field, you can click on the {..} next to the field to select one of the user fields, like the name of the user. But what I like to do is make it look like this:
{Name (First):2.3} {Name (Last):2.6} via websitename.com
This means the form will come to me with the user’s first and last name, but it’ll also be obvious that this is a website submission and wasn’t sent directly from the user’s
Next, you want to change the From Email address, and this is super important. By default, it will be coming FROM you TO you. Let’s fix that up, but maybe not you think. You are probably inclined to make the from email address the user’s email. And this isn’t necessarily wrong, but there’s a reason why I recommend against it.
There are certain email addresses, like Yahoo and AOL, whose emails will not go through if they are in the “from” field of these forms. The reason is because those emails are configured to stop spam, and if the email is coming from your website, then it’s not really coming from them. So it gets stopped in its tracks. Instead, I recommend making the from email address something like wordpress@yourdomain.com, that way, it’s coming from through your website, from your website.
Instead, in the Reply To field, that’s where you put in the user’s email address. That way, if you reply to the email, it goes to the person who sent it, but it’s less likely to not be delivered or get caught in spam. Then if you want, you can also adjust the BCC and put in another email or manager, etc, and adjust the title however you want.
This is the notification that YOU, as the website owner, gets when someone submits the form. But you can also add additional notifications that go elsewhere. For example, you might want the person who submits the form to get a message, or maybe your office manager needs to know something from the submission, etc. Notifications don’t have to only go to you, you can set up multiple notifications in Gravity Forms.
And there you have it, those are the three main components to a working and functional Gravity Form in WordPress.
What’s next?
After you’ve created the form, chosen your confirmation message, and updated the form notification, it’s time to put your form on a page.
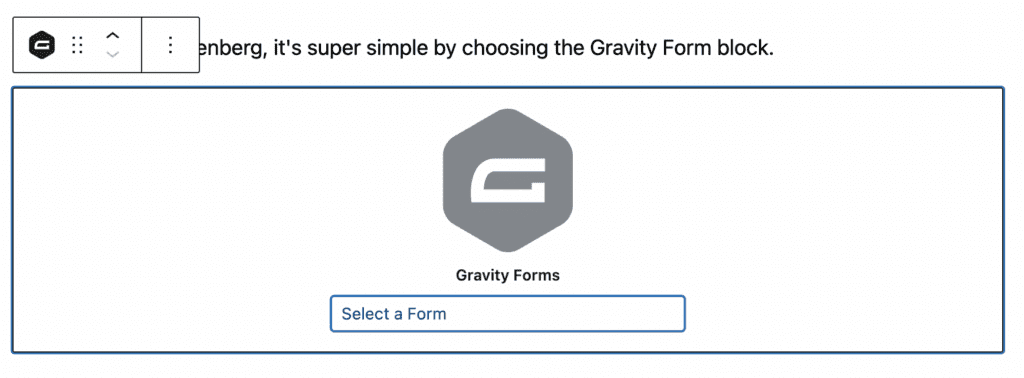
If you are using Gutenberg, it’s super simple by choosing the Gravity Form block. Just add the block, select your form, and you’re ready to go.

If you are still using the Classic Editor, there’s a Gravity Forms button for you.
And, if you want a third option, you can always pop it in using the Gravity Forms shortcode.
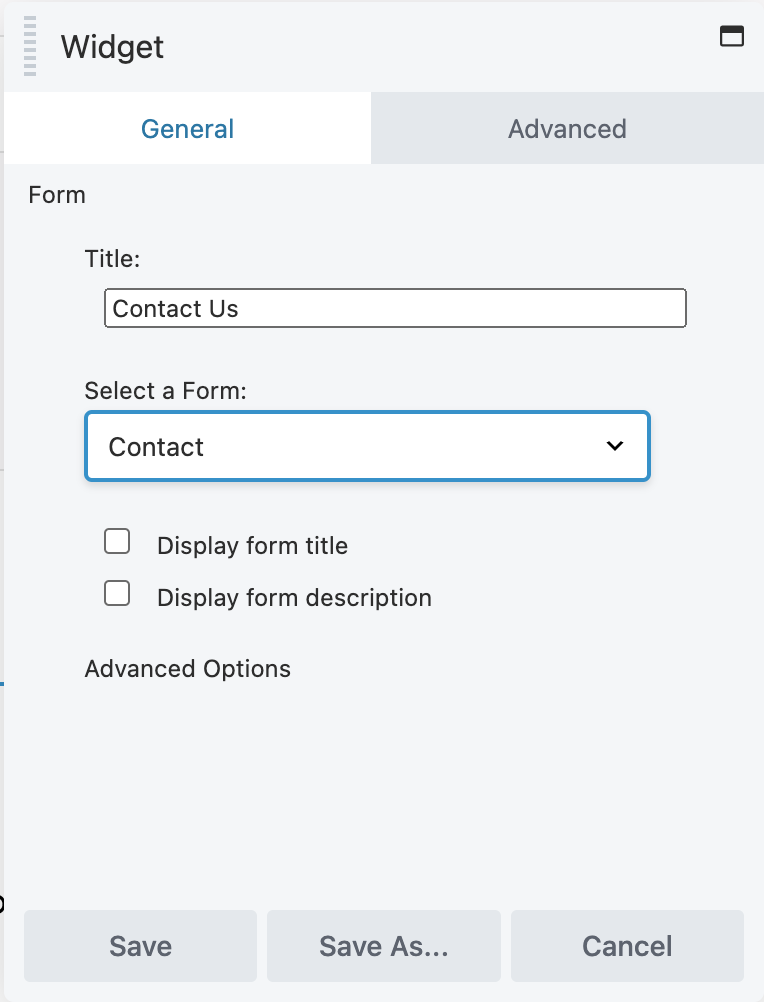
[gravityform id="1" title="false" description="false" ajax="true"]If, like me, you are a user of Beaver Builder, you can use a Form widget to add it to your page. This works to add it to a sidebar as well. Or if you have the PowerPack Beaver Builder Addon, you can use their advanced module to not just add the form, but do tons of custom styling. This is my preferred method, but of course, it does require a few premium plugins to become an option.

Are we done yet?
Not quite!
Now that you have the form on your page, please take a minute and GO TEST IT. There are several reasons for this.
- To experience the form how your user will experience it. This allows you to make sure the experience is good, the messaging is how you intended, and there are no errors.
- To see what the notification looks like. Are you getting the information you needed? Did you forget a field?
- To make sure you get the notification. At least once a day I have to ask someone to look in your spam folder for these messages. If you submit a test, that message should arrive in your inbox pretty fast.
What happens if you don’t get the message?
The first thing you should do is check in your spam folder. If you don’t see it right away in your inbox, there’s a larger than average chance it wound up in spam. It can go into spam for a number of reasons – your email doesn’t recognize the sender, the email address in the form has been blacklisted as a spammer, the content of the message could trigger it. One time all the form messages were going to spam because a website on the same shared server had been hacked and the website’s IP was blacklisted. Even though this website wasn’t hacked, it still was affected by the hack.
If you find that message in spam, the first thing you should do is move it out of spam and mark it as not spam. Then, add the “From Email” (the wordpress@yourdomain.com) to your address book so that your email knows this is not a spam email address. Then test the form again. This should fix it, but I do recommend that you periodically check your form entries in your website to make sure you aren’t missing any.
What if it’s not in spam?
Well, then it gets trickier and we need to do some troubleshooting. First thing’s first, go look at your form notification and make sure that your email address in the To Email field doesn’t have a typo. 🙂 This happens more often than you think. (And I’m no exception. I signed up for the Chicago Marathon lottery and entered my email with a typo – which ensured I got no confirmations for my entry or my acceptance. It happens to the best of us!)
If the email address is correct, then the next step is to try a different email address. If you have another email address, one that doesn’t use the same type of service (for example, don’t switch out one Gmail for another Gmail), change the To Email to your other email address and test the form again. If the email comes in to that one, then we know it’s a problem with the email and not a problem with the website.
If you still don’t see it, then I recommend setting up something like MailGun or SendGrid. These are email delivery services that help ensure your messages get delivered. Both of these have free levels so unless you are getting hundreds of messages, you can probably use either of them for free. However, it does take some DNS record changes to make it work and that can be a bit confusing for people who haven’t messed around with their DNS records before. (Some of the better hosts already use a sending delivery service set up on their hosting plans, so that saves you this hassle. Just a plug for better hosting.)
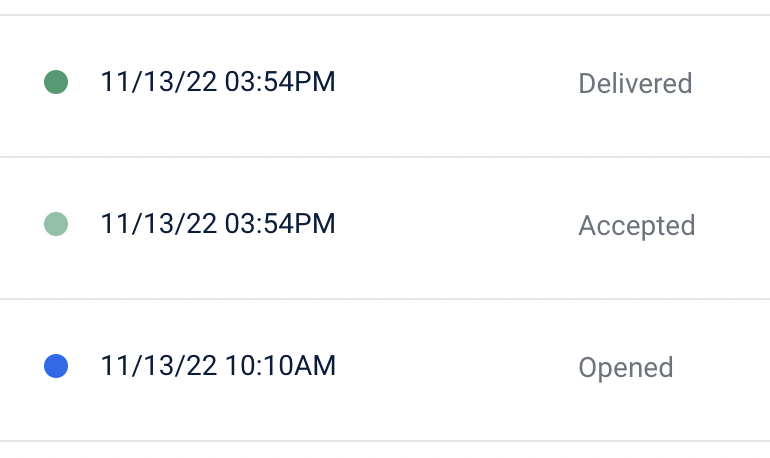
Once you get one of these set up, you can test the form again, then go look at your logs and see exactly what is going on with the email. If the message is being rejected, you can see why and try to sort that out.
In general, I do recommend a sending delivery service for all websites, because it increases the deliverability and decreases the changes of missing those messages. We can help set that up for you if needed, just contact us for more info.
A few more form tips!
- Don’t ask for more information than you need. The longer the form, the more complicated it is, the more likely people are to abandon it while filling it out. Get what you need, but no more.
- Make the phone number field optional if you include that field and it’s not essential to the lead.
- Change the button text to something that is more exciting than “Submit” even if it’s just “Send Message.”
- Make sure the input boxes have text that is big enough to see and isn’t too light gray. Sometimes by default of your theme, the text in there gets almost too light to see.
- Give your users a good reason to fill out that form. Always remember that you want the lead, it’s not the other way around. Make sure they want to submit your form!
And there you go, how to create a functional and hopefully successful form using Gravity Forms for WordPress. Most of these tips will apply to any form builder you want to use – so while the instructions for Gravity Forms are specific, the three components of a good form – the form, the notification, and the confirmation – those apply to any form you build in or outside of WordPress.
This post may include affiliate links.

Amy Masson
Amy is the co-owner, developer, and website strategist for Sumy Designs. She's been making websites with WordPress since 2006 and is passionate about making sure websites are as functional as they are beautiful.