
There’s a better way!
If you have a website that offers any kind of download for users, typically PDFs but there can be others too like Word docs, CSV files, etc, it’s really tempting to upload those right into the media library. It’s easy to do. It’s called media library for a reason. Seems like just the place. But if you have more than one download you want to make available, of if you expect your download to change from time to time – like if you edit some of the content in your file – then it’s a good idea to do it a little differently and use a download manager.
What is a download manager?
A download manager plugin for WordPress is a tool that allows you to manage and control the downloading of files from your WordPress site. It enhances the default capabilities of WordPress when it comes to handling file downloads. Some popular features of download manager plugins include the ability to track download statistics, control access to files, and organize downloads into categories.
There are several plugins available in the WordPress plugin repository that can serve as download managers. Some examples include “Download Monitor,” “Easy Digital Downloads,” and “Download Manager.” These plugins typically provide a user-friendly interface within the WordPress dashboard, making it easy for site administrators to upload files, track downloads, and set various download options.
Why use a download manager
I have several reasons why I recommend using a download manager. If you have just one or two downloads, and they won’t change, then you probably don’t really need what a download manager has to offer. But if you have more, or they will change often, then you should use a download manager. Here are a few reasons why.
- Using a download manager allows you to link to your download from multiple places in your website, and then if you change the download, you only have to change it in the download manager. If you link to a download from the media library, and then you upload a new version, then you have to go find every link to that download and fix the link. And if it’s in the media library, it could potentially still be picked up by search engines and available for people to find by accident. AND, people who may have saved the link to that file in an email or bookmark can still go back and get the wrong download. You can eliminate having the wrong file, and save a lot of work when updating, by using a download manager.
- Using a download manager allows you to track if people are downloading your downloads. Wouldn’t it be nice to know if people are actually downloading and using your resources? Having a download manager provides you with stats that let you see how many times they’ve been downloaded.
- You can categorize and tag your downloads so you can present them in an organized and cohesive way.
- Having a download manager allows you to create download libraries on your site, where you present your downloads in various ways, including the ability to sort and filter your downloads.
- And finally, it gives you a nice, easy way to present your download rather than a regular old text link.
How to use Download Manager
You are welcome to look through the different plugins to find the one that suits you best. I have used all three I mentioned at various times and they all work well, although a bit differently. But today I want to talk about the one I use most consistently, and that is Download Manager. This is a little confusing because it’s a download manager called Download Manager. There’s a free version in the repository, and a premium version available on their website. For most sites, I’ve been able to get all the features I need with the free version, but the paid version gives you some more options like the ability to sell downloads. There are also a number of free extensions, like one that integrates with Elementor (sure wish they had this for Beaver Builder, hint hint), plus add-ons for DropBox, Gutenberg, etc.

Step 1: Install Download Manager
Installing a WordPress plugin is a straightforward process. Here’s a step-by-step guide on how to install the “Download Manager” plugin:
- Log in to Your WordPress Dashboard:
- Navigate to the Plugins Page:
- In the WordPress dashboard, go to “Plugins” in the left-hand menu.
- Click on “Add New”:
- Once on the Plugins page, click the “Add New” button at the top.
- Search for the “Download Manager” Plugin:
- In the search bar on the top right, type “Download Manager.”
- Locate the Correct Plugin:
- Look for the “Download Manager” plugin by “wpdownloadmanager.” It should be the one you want.
- Install the Plugin:
- Click the “Install Now” button next to the “Download Manager” plugin.
- Activate the Plugin:
- After the installation is complete, click the “Activate” button to activate the plugin.
Once you activate, you are ready to go with a fully functional download manager. Simply navigate to Downloads in the left menu, and go to Add New. And it looks an awful lot like adding a new post or page in the Classic Editor.
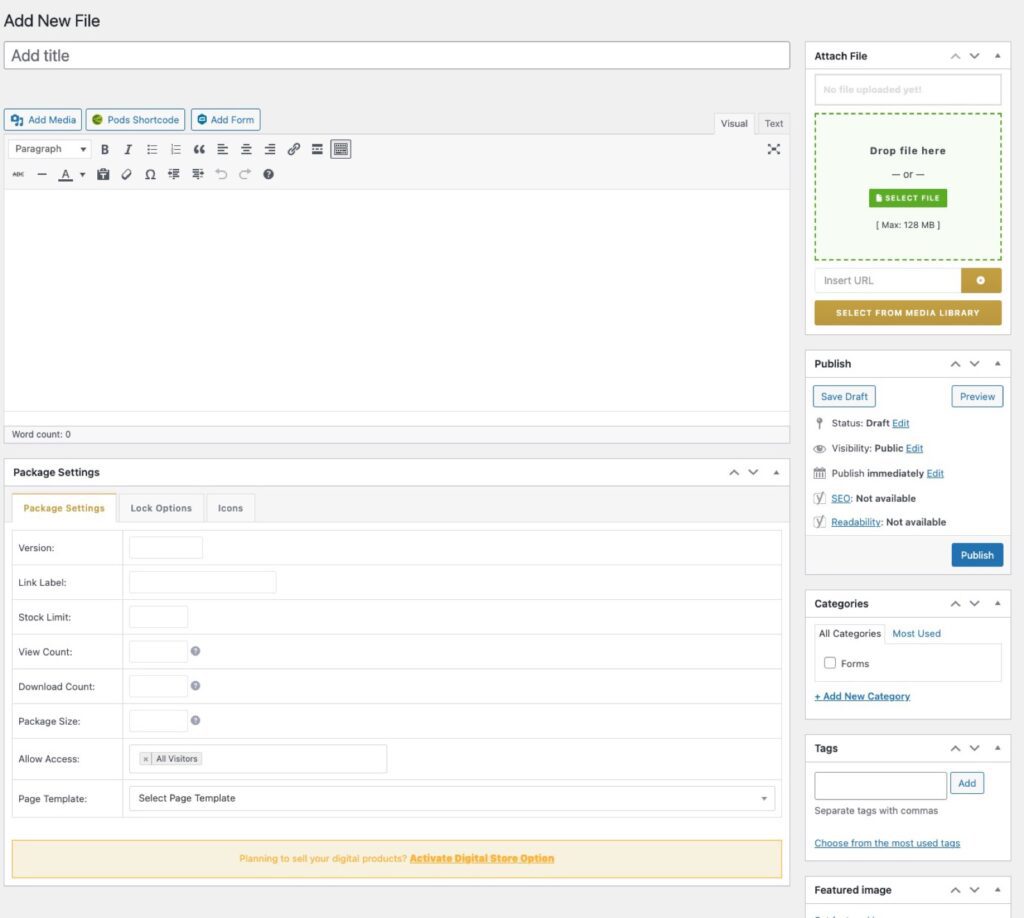
Add in the title of your download. You can give it a description if you want. And then on the right, you have a place to attach your file, and all it requires is dragging and dropping it in to that green block. Then you can choose to categorize it, tag it, or even give it a featured image. Then hit Publish, and you’ve got your download ready to download.
But wait, there’s one more step! First we’ve uploaded the download. Now we have to add it where we want users to find it on the site. And it’s SO EASY!
First, go to Downloads and then All Downloads. From here, you can see all you downloads in a nice list.
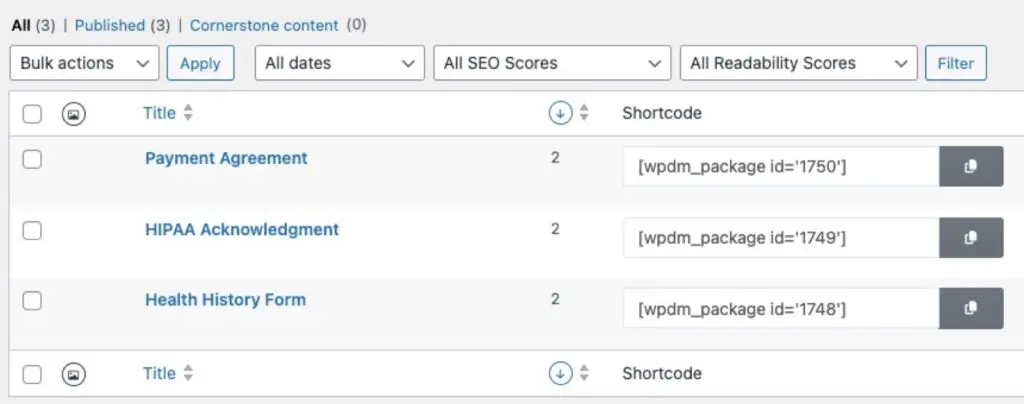
Then see that shortcode? You can copy and paste that, or just click that little icon to the right of the shortcode to copy it, and paste it anywhere you want on your site. You can paste it multiple places if you want. You can paste it into every page, paste it into the header or footer, paste it into a blog post. Go crazy. Okay, don’t go crazy, just paste it where you need it. It’ll look like this on the website.

Of course, you can set the coloring to match your website, which is why this one is gold. But then someone will be able to click the download button and download that file. (Note, the above button doesn’t work because this is just a graphic of how it looks, not an actual download.)
This looks pretty good and pretty easy right out of the box, with not a lot of configuration on your part. There are other templates you can use to showcase your downloads, which you can choose from settings. And, for advanced users, you can edit the template files in your theme to customize them even more.
You can adjust the colors in your settings as well, so it coordinates with your site. By default, it uses the colors that go with the plugin’s brand.
How to change the download
Say you have made an edit on your download, and you’ve added that download to three pages on your site and now you need to change out the document. Here’s how you would do it. You’d navigate to Downloads-> All Downloads. In the list, find the download you want to edit and open it. On the right, you’ll see that green box where you originally added your download. And you can see the name of the download at the top with a little red trash can next to it. To get rid of that old file, just click on the trash can.
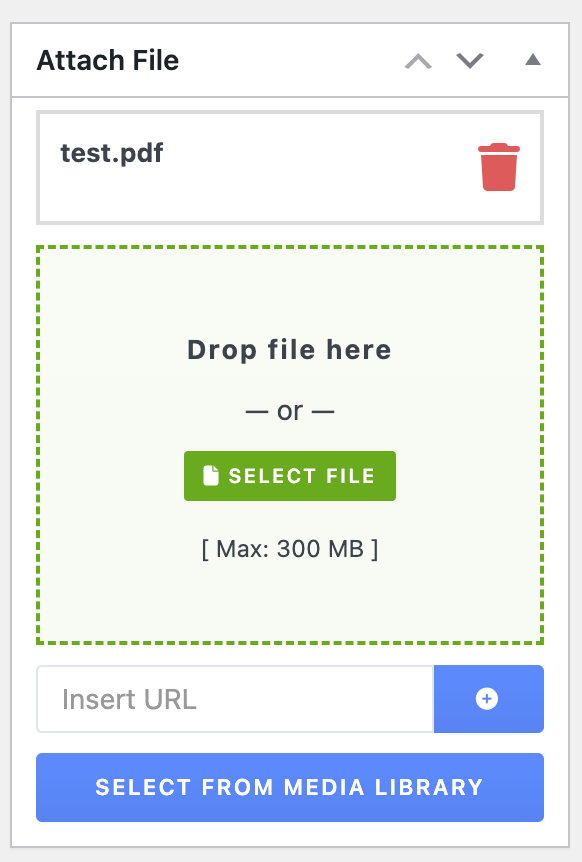
And then you just upload your new document by dropping it into the same green box, and clicking the update box. And voila, you have updated that download every place you’ve linked to it on your site. Doesn’t matter if you added that download to 10 places or 100 places, all the downloads will be correct.
How to add a download library
Say you have a lot of downloads you want to make available. It’s easy to do using Download Manager. You can have a library with all your downloads or with just downloads from one category. It could look something like this:
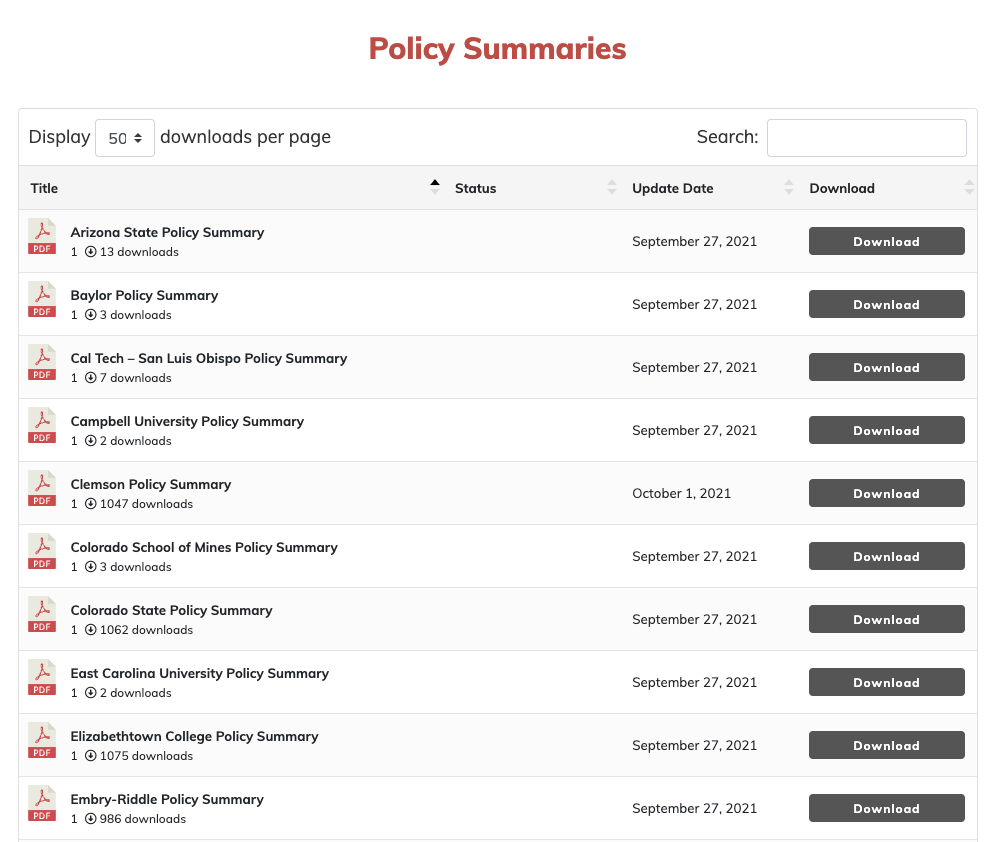
You can see all the downloads available, find the one you want, sort or filter them, and download them. Cool, huh?
You can achieve this two ways. One is by using a shortcode provided with the plugin. (See the shortcodes here.) Here’s an example:
[wpdm_category id=”Health Documents” operator=”IN” title=”Download Title” toolbar=”1″ paging=”1″ orderby=”title” order=”asc” items_per_page=”10″ cols=1]
That shortcode will give you a very nice download table with all your documents in the Health Documents category.
Another way to do this is with Gutenberg blocks, which is my preferred way. But first, you have to install the Gutenberg block add-on for Download Manager. Adding this plugin gives you a selection of blocks that you can add to your posts or pages that give you lost of choices.
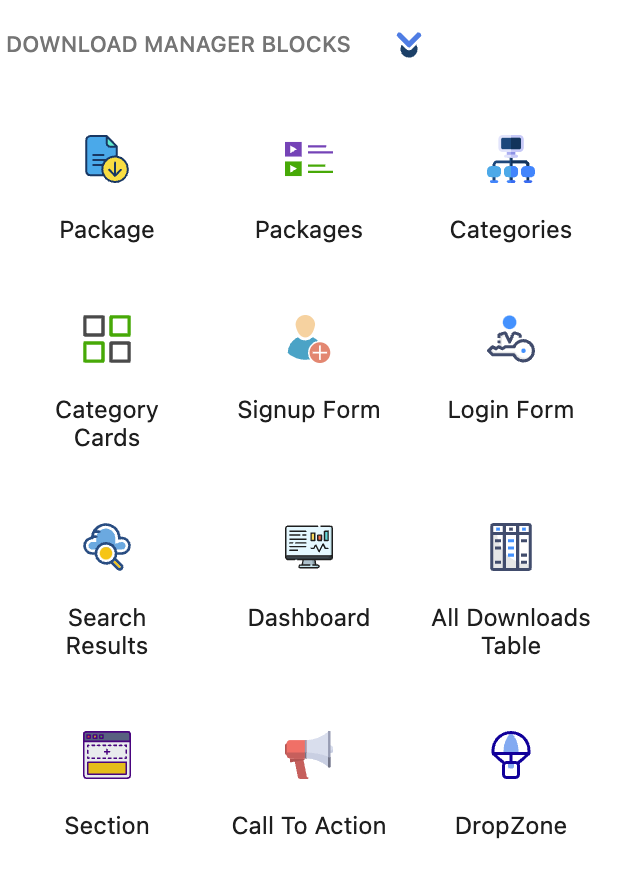
You simply pick the one you need, be it a single download package, or a category, and then configure the options for that block (like selecting the category, the items per page, ordering, etc) and when you publish your post or page, you’ll have a nice download area.
You can use this plugin to allow downloads of all types of Microsoft files (doc, .docx, .xls, .xlsx, .ppt, .pptx, .pps, .ppsx), PDFs, CSVs, any image files (png, jpg, gif, webp, heic, heif, svg), as well as audio and video files too. It’s a handy plugin and really useful if you plan to offer downloads on your website.
Need help setting up Download Manager on your WordPress website? Contact us today. Our web design services can help!
Amy Masson
Amy is the co-owner, developer, and website strategist for Sumy Designs. She's been making websites with WordPress since 2006 and is passionate about making sure websites are as functional as they are beautiful.
